
5 ตัวอย่าง HTM+CSS ทำได้ ไม่ต้องใช้ JavaScript
เดียวนี้พลังของ HTML+CSS ไปไกลมากแล้วไม่ใช่เพียงแค่ทำหน้าตาแสดงผลได้อย่างเดียว แต่มีลูกเล่นเพิ่มเติมให้กับคนใช้เว็บด้วย ซึ่งก่อนหน้านั้นความสามารถลูกเล่นต่าง ๆ เราจำเป็นต้องใช้ JavaScript มาช่วย
การที่เราเขียนเพียงแค่ HTML+CSS นั้นช่วยทำให้โค้ดของเราเรียบง่ายขึ้น ง่ายต่อการบำรุงรักษา และมักจะมีประสิทธิภาพมากกว่า วิธีคิดนี้มาจากหลักการพื้นฐานในการพัฒนาเว็บที่เรียกว่า "กฎของการใช้น้อยที่สุด" (Rule of Least Power)
กฎของการใช้น้อยที่สุด
กฎของการใช้น้อยที่สุดนั้นเรียบง่าย ใช้ภาษาที่มีพลังน้อยที่สุดที่เหมาะสมกับงาน ในการพัฒนาเว็บ นี่หมายถึงการเลือกใช้ HTML แทน CSS และใช้ CSS แทน JavaScript เมื่อเป็นไปได้ เหตุผลที่อยู่เบื้องหลังคือ
- HTML เป็นภาษาที่อธิบายได้และมีน้ำหนักเบา เหมาะสำหรับการจัดโครงสร้างเนื้อหา
- CSS ก็เป็นภาษาที่อธิบายได้เช่นกัน ใช้สำหรับการตกแต่ง มีตัวเลือกในการจัดเลย์เอาต์และการโต้ตอบมากมายที่ไม่จำเป็นต้องใช้ JavaScript
- JavaScript แม้จะมีพลังมาก แต่ก็เพิ่มความซับซ้อน มีต้นทุนด้านประสิทธิภาพ และมีความเป็นไปได้ที่จะเกิดข้อผิดพลาดได้มากเช่นกัน
ดังนั้น เรามาดูตัวอย่าง GitHub repository ที่จะแสดงให้เห็นถึงบ้างอย่างที่อาจเคยใช้ JavaScript แต่สามารถทำให้ได้ผลลัพธ์ที่ดีกว่าด้วย HTML และ CSS เพียงอย่างเดียว ตัวอย่างเหล่านี้จะแสดงให้เห็นว่าเราสามารถทำให้โค้ดเรียบง่ายขึ้นในขณะที่ยังคงรักษาฟังก์ชันการทำงานและประสิทธิภาพได้อย่างไร
ตัวอย่าง 1: Custom Switches (Checkboxes without JS)
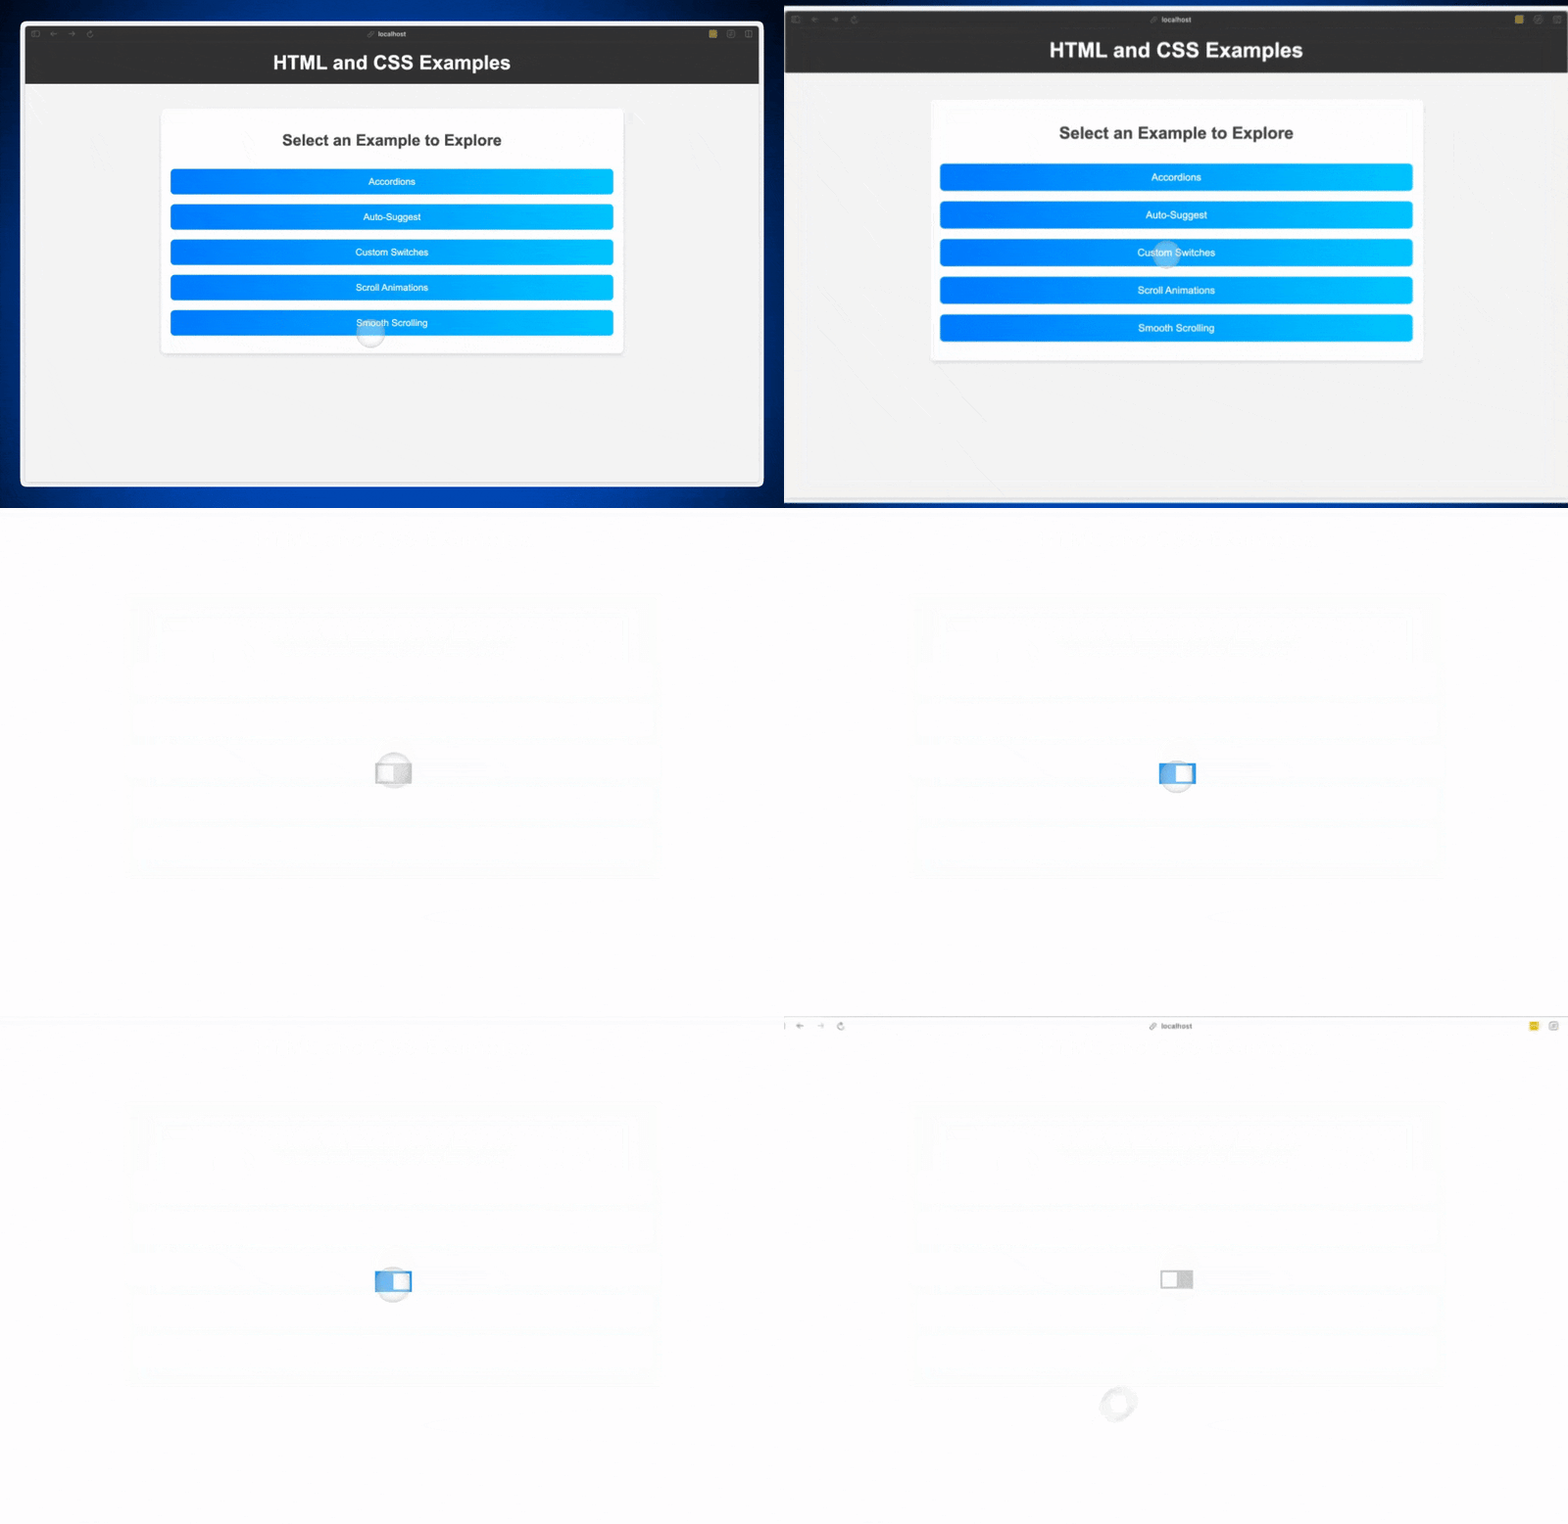
HTML
<label class="switch">
  <input type="checkbox" class="switch-input">
  <span class="switch-slider"></span>
</label>
CSS
/* The outer container for the switch */
.switch {
  position: relative;
  display: inline-block;
  width: 60px;
  height: 34px;
}

/* The hidden checkbox input */
.switch-input {
  opacity: 0;
  width: 0;
  height: 0;
}

/* The visible slider (background) of the switch */
.switch-slider {
  position: absolute;
  cursor: pointer;
  top: 0;
  left: 0;
  right: 0;
  bottom: 0;
  background-color: #ccc;
  transition: .4s;
}

/* The circle (slider button) inside the switch */
.switch-slider:before {
  position: absolute;
  content: "";
  height: 26px;
  width: 26px;
  left: 4px;
  bottom: 4px;
  background-color: white;
  transition: .4s;
}

/* Pseudo-class that styles the switch when the checkbox is checked */
.switch-input:checked + .switch-slider {
  background-color: #2196F3;
}

/* Moves the slider button to the right when the switch is checked */
.switch-input:checked + .switch-slider:before {
  transform: translateX(26px);
}
ตัวอย่าง 2: Auto Suggest with <datalist>
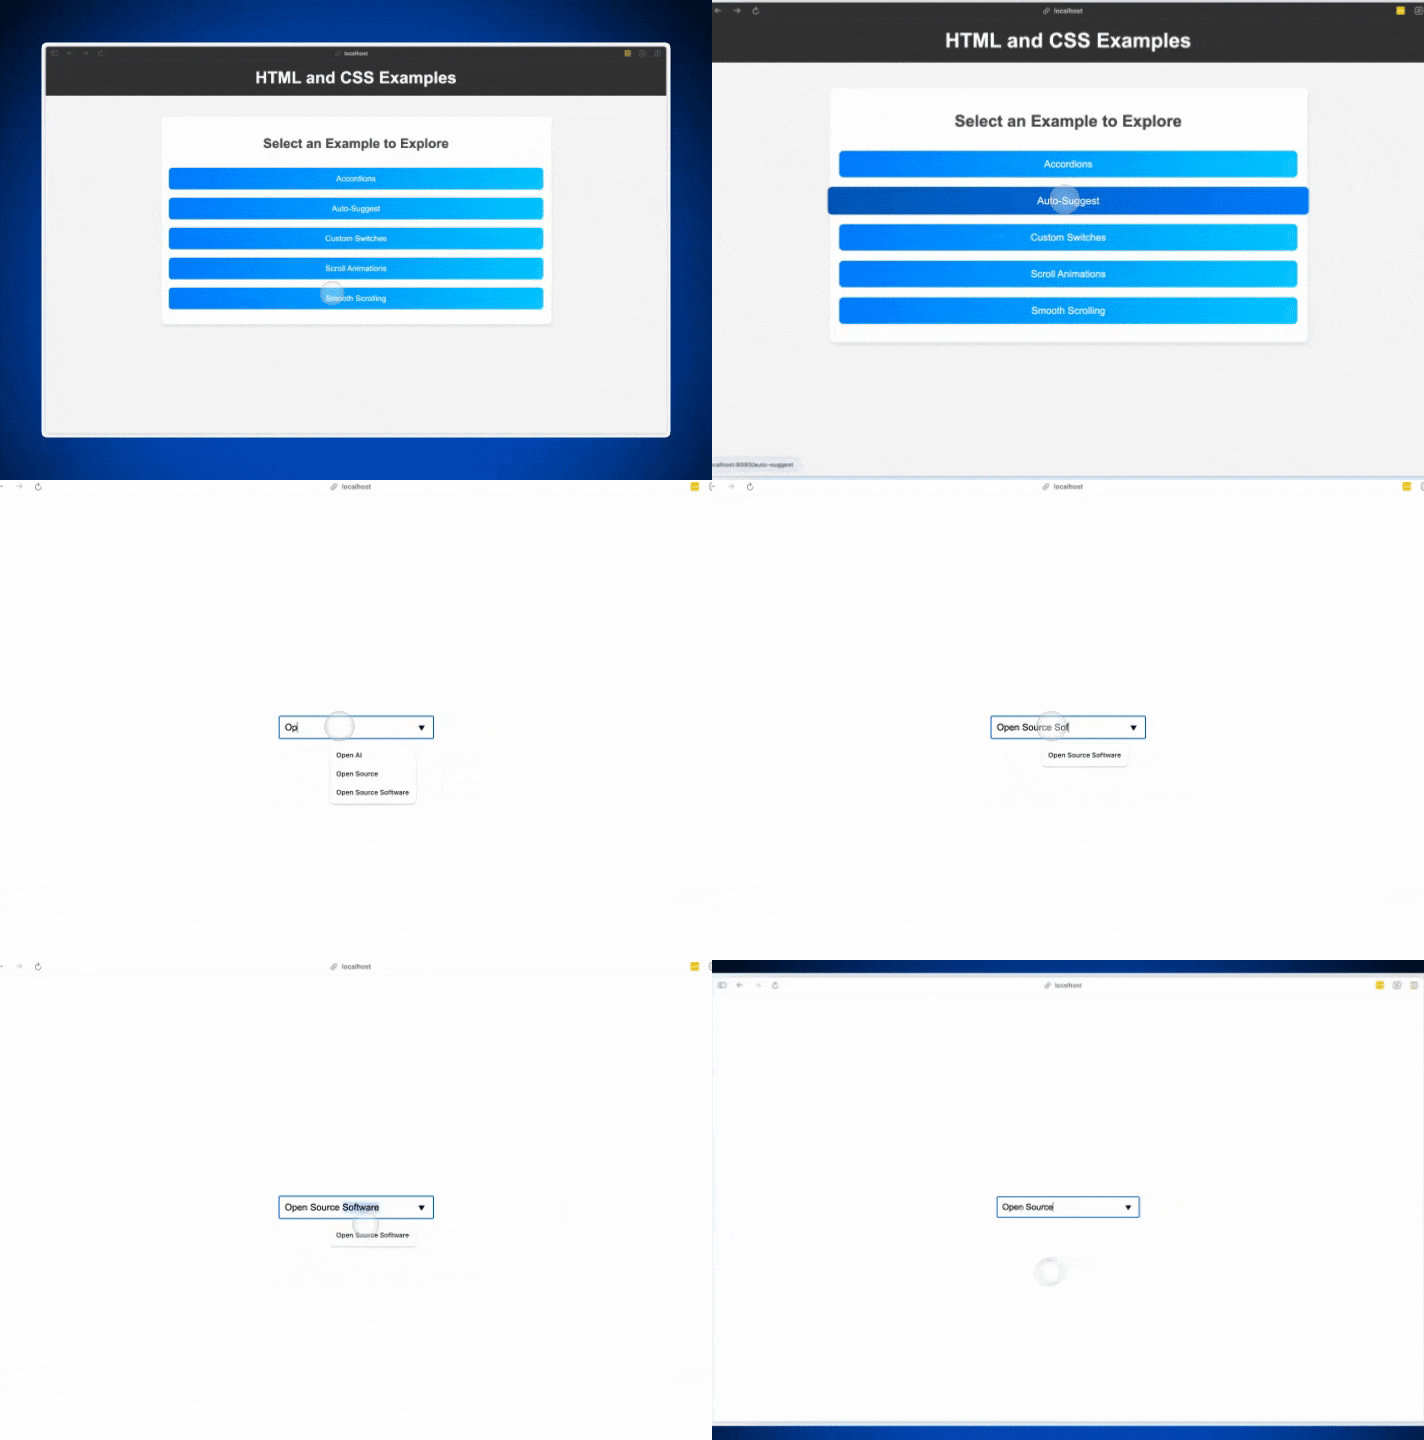
HTML
<input type="text" list="suggestions" placeholder="Choose an option...">
<datalist id="suggestions">
  <option value="Open AI">
  <option value="Open Source">
  <option value="Open Source Software">
</datalist>
CSS
.container {
  width: 300px;
  display: block;
}

input {
  padding: 10px;
  font-size: 18px;
  width: 100%;
  box-sizing: border-box;
}
ตัวอย่าง 3: Smooth Scrolling with CSS
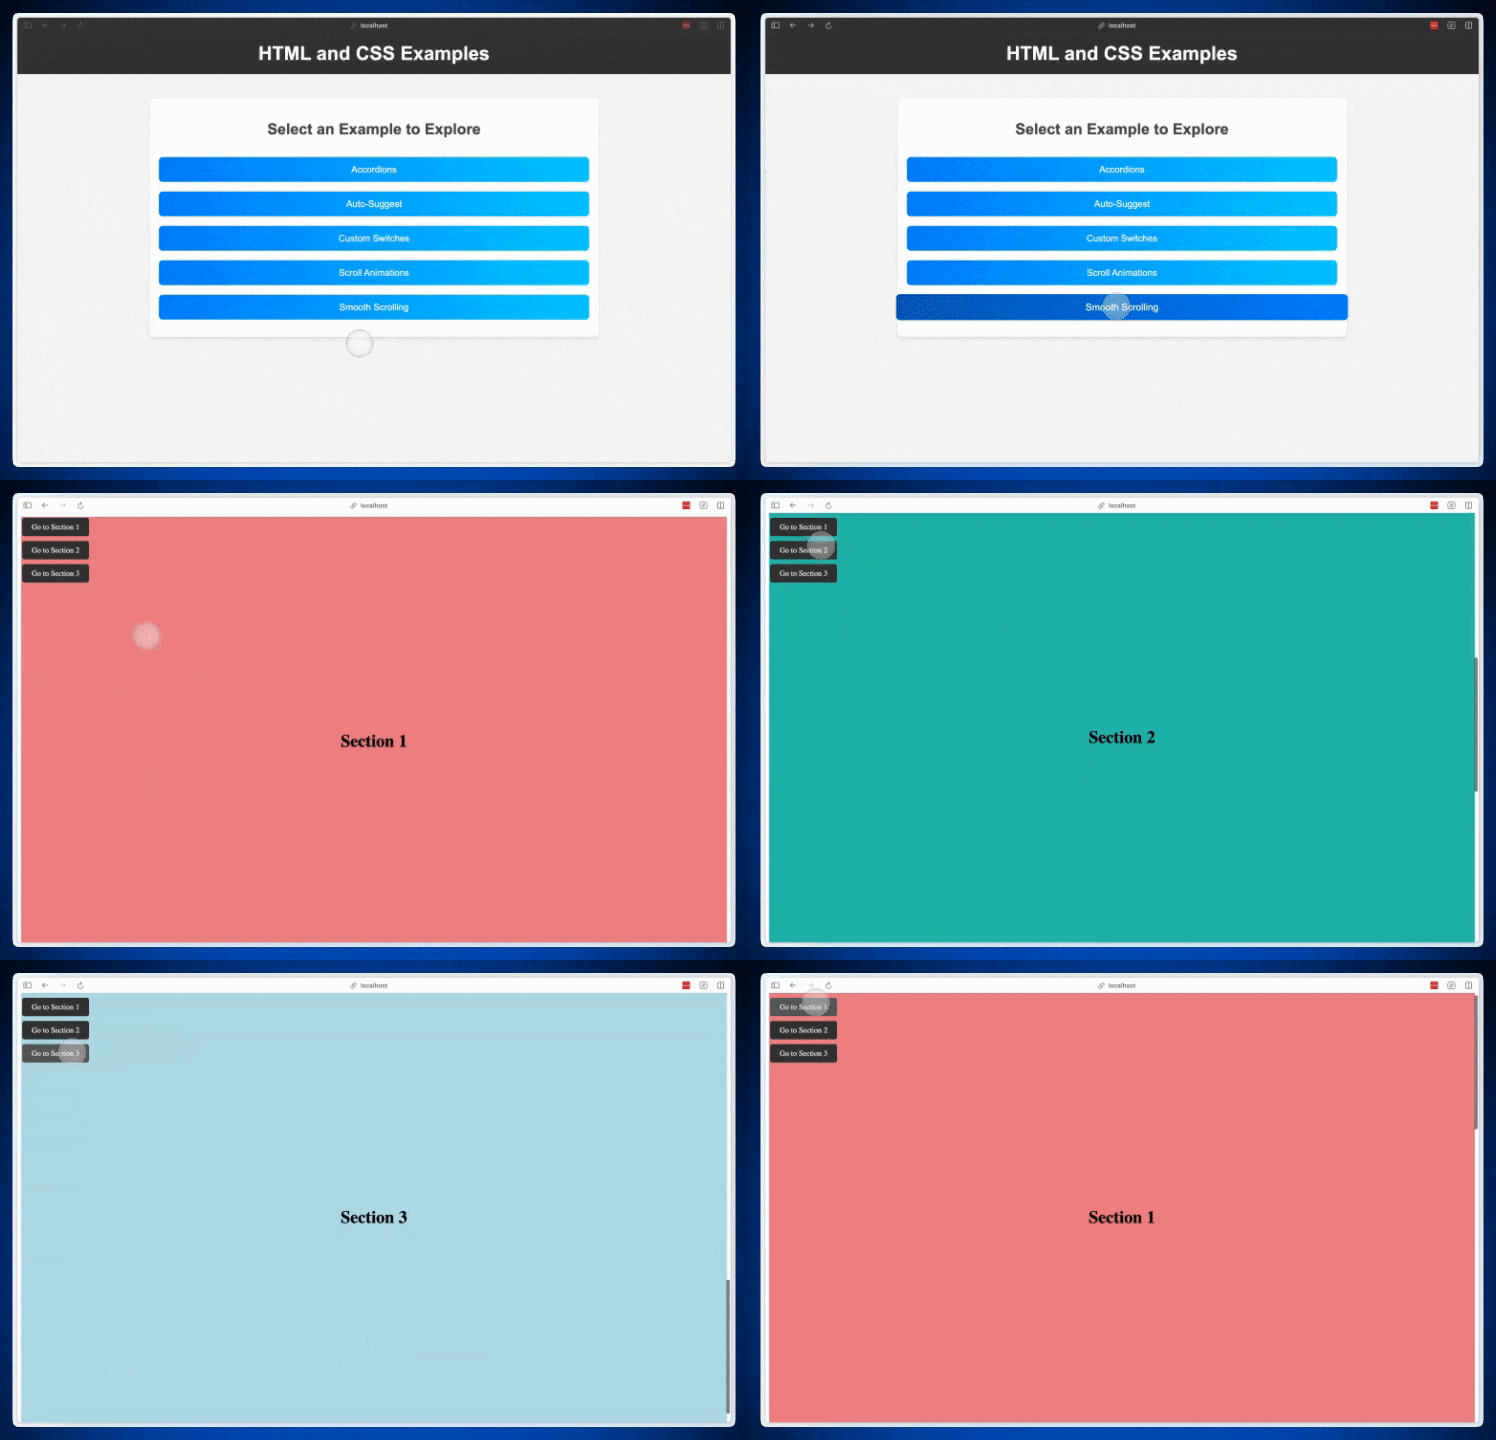
HTML
<nav>
  <a href="#section1">Go to Section 1</a>
  <a href="#section2">Go to Section 2</a>
  <a href="#section3">Go to Section 3</a>
</nav>

<!-- Section 1 -->
<section id="section1">
  <h2>Section 1</h2>
</section>

<!-- Section 2 -->
<section id="section2">
  <h2>Section 2</h2>
</section>

<!-- Section 3 -->
<section id="section3">
  <h2>Section 3</h2>
</section>
CSS
/* Basic styling for sections */
section {
    height: 100vh;
    padding: 20px;
    font-size: 24px;
    display: flex;
    justify-content: center;
    align-items: center;
}

/* Different background colors for each section */
#section1 {
    background-color: lightcoral;
}

#section2 {
    background-color: lightseagreen;
}

#section3 {
    background-color: lightblue;
}

/* Styling for the navigation */
nav {
    position: fixed;
    top: 10px;
    left: 10px;
}

nav a {
    display: block;
    margin-bottom: 10px;
    text-decoration: none;
    color: white;
    padding: 10px 20px;
    background-color: #333;
    border-radius: 5px;
}

nav a:hover {
    background-color: #555;
}
ตัวอย่าง 4: Accordions <details> และ <summary>
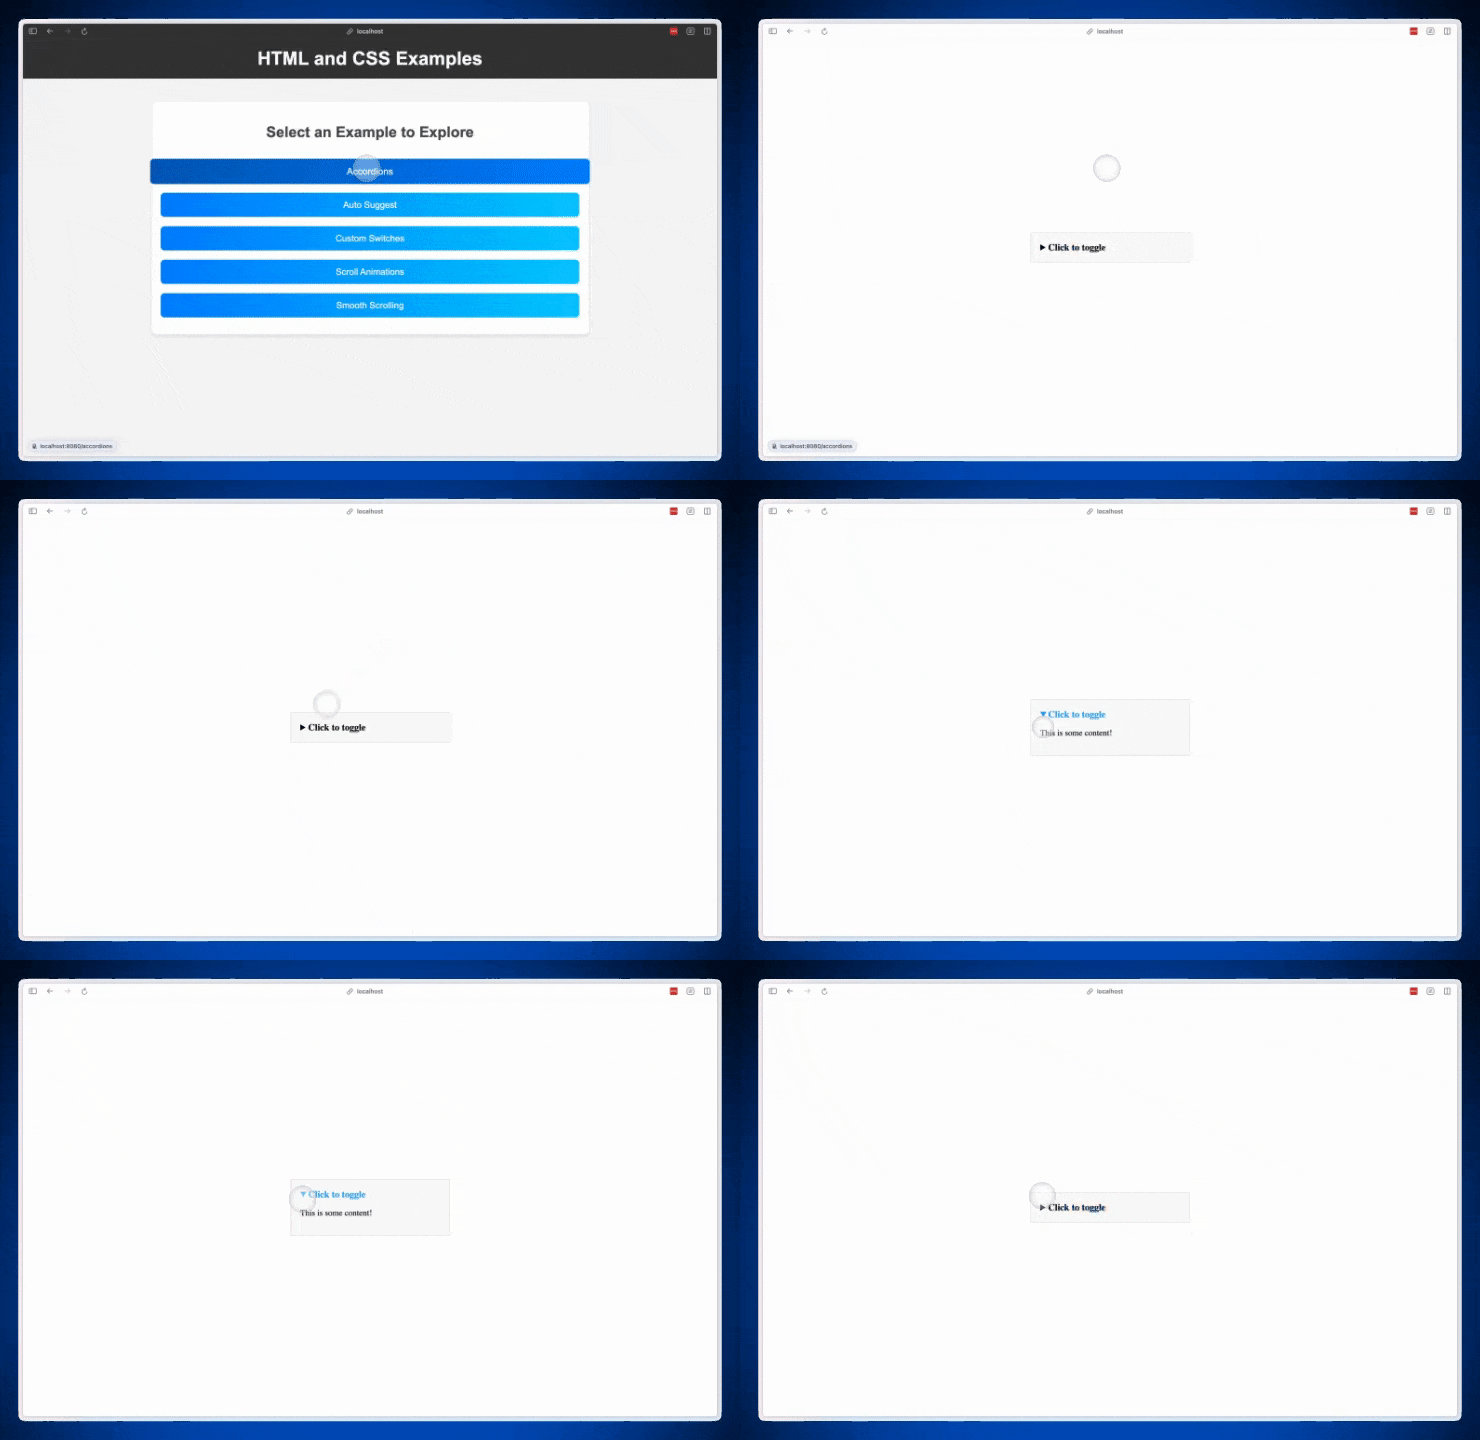
HTML
<details>
  <summary>Click to toggle</summary>
  <p>This is some content!</p>
</details>
CSS
details {
  width: 300px;
  background-color: #f9f9f9;
  padding: 20px;
  border: 1px solid #ddd;
  font-size: 18px;
}

summary {
  cursor: pointer;
  font-size: 20px;
  font-weight: bold;
}

details[open] summary {
  color: #2196F3;
}
ตัวอย่าง 5: Scroll-Triggered Animations with CSS
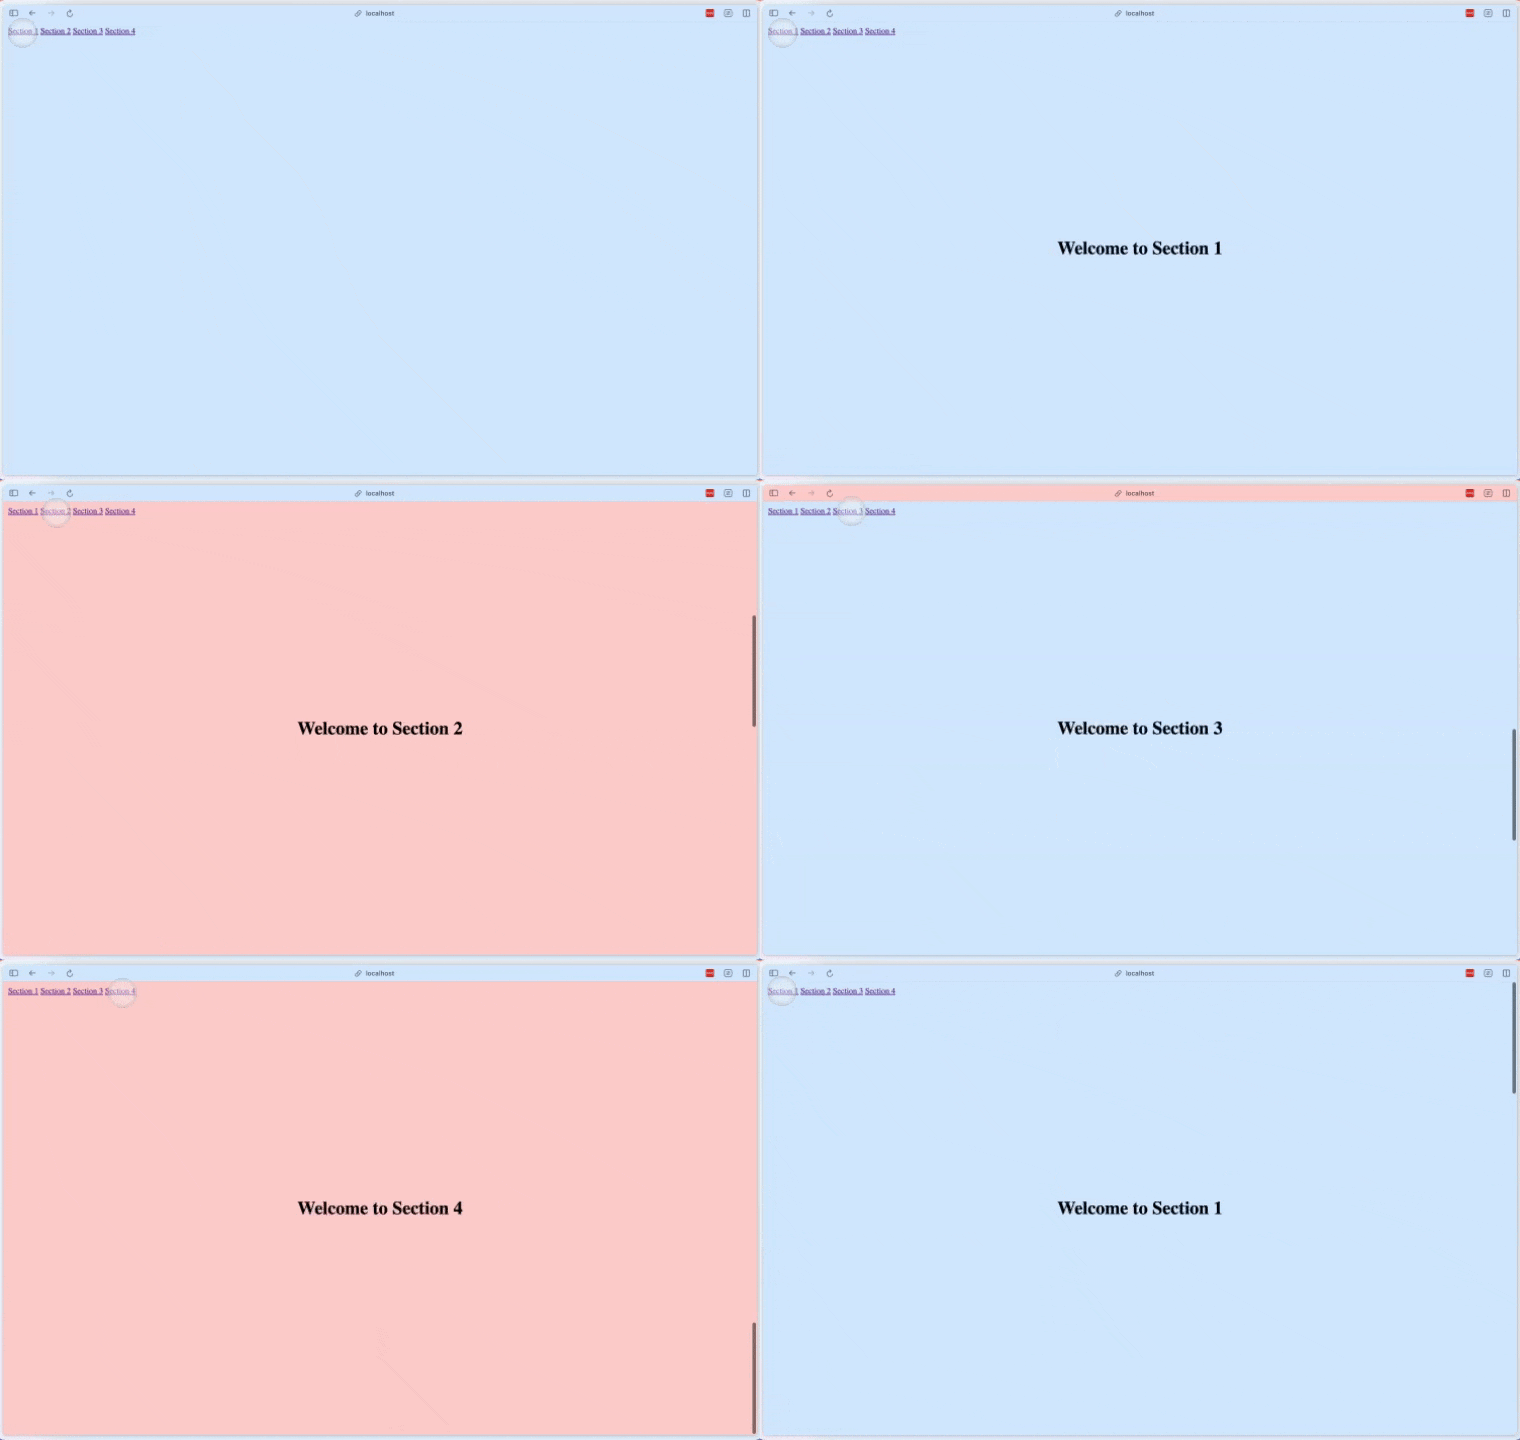
HTML
<body>
     <!-- Navigation with anchor links -->
     <nav style="position:fixed; top:10px; left:10px;">
        <a href="#section1">Section 1</a>
        <a href="#section2">Section 2</a>
        <a href="#section3">Section 3</a>
        <a href="#section4">Section 4</a>
    </nav>

    <!-- Section 1 -->
    <section id="section1">
        <h2>Welcome to Section 1</h2>
    </section>

    <!-- Section 2 -->
    <section id="section2">
        <h2>Welcome to Section 2</h2>
    </section>

    <!-- Section 3 -->
    <section id="section3">
        <h2>Welcome to Section 3</h2>
    </section>

    <!-- Section 4 -->
    <section id="section4">
        <h2>Welcome to Section 4</h2>
    </section>
</body>
CSS
html {
    scroll-behavior: smooth;
}

/* Remove body margins */
body {
    margin: 0;
}

/* Full viewport height for sections with centered content */
section {
    display: flex;
    justify-content: center;
    align-items: center;
    height: 100vh;
    background-color: #f0f0f0;
    transition: background-color 0.6s ease-in-out;
}

/* Styling for headings */
section h2 {
    font-size: 36px;
    margin: 0;
    transition: transform 0.6s ease, opacity 0.6s ease;
    opacity: 0;
    transform: translateY(30px);
}

/* Add margin for scroll snapping */
section:nth-child(odd) {
    background-color: #ffcccb;
}

section:nth-child(even) {
    background-color: #d0e7ff;
}

/* Scroll-triggered animation */
section:target h2 {
    opacity: 1;
    transform: translateY(0);
}
ยกเลิกความซับซ้อนด้วย HTML และ CSS
มีหลายกรณีที่เราสามารถหลีกเลี่ยงความซับซ้อนของ JavaScript ได้โดยการใช้ฟีเจอร์ที่มีอยู่ของ HTML และ CSS ซึ่งมันจะช่วยให้โค้ดของเราง่ายต่อการบำรุงรักษาและอ่านง่ายขึ้น ซึ่งพอมาดูโดยรวมแล้วมันเป็น "การใช้น้อยที่สุด" เพื่อทำให้ดีออกมาที่สุด โดยไม่จำเป็นต้องพึ่งพา JavaScript ที่ซับซ้อน
ลองไปปรับใช้กันดูนะ 😃
Thanks: https://dev.to/tinymce/5-essential-html-and-css-tricks-to-ditch-javascript-40kh
