

SonarQube เอาไว้ใช้ตรวจสอบคุณภาพของ code เรา และหาข้อผิดพลาด หรือหา bugs ที่อาจจะทำให้แอพพลิเคชั่นเราเกิดความเสียหายได้ และยังมีการแนะนำเพื่อปรับปรุงคุณภาพให้ดียิ่งขึ้นด้วย ซึ่งถ้าเราอยากเขียน code ให้ดีขึ้น แนะนำให้ลองหามาใช้ดู
โดยตัว SonarQube นั้นจะมีให้เลือกใช้งานในรูปแบบ Cloud เพื่อความสะดวกแต่ก็จะมีค่าใช้จ่ายตามการใช้งานจริง หรือใครอยากติดตั้งบน server ตัวเองก็ได้ ซึ่งพอดีผมได้มีโอกาสได้ลองติดตั้งเองเพื่อไปใช้งานในโปรเจ็คก็เลยอยากเขียนวิธีการติดตั้งมาให้อ่านกัน...
Software version
ในบทความนี้จะเป็นการติดตั้งเวอร์ชั่นของซอฟแวร์ต่างๆ ดังนี้
- SonarQube Community EditionVersion 9.9
- Ubuntu 22.04 LTS
- OpenJDK 17
- PostgreSQL 15
โดยเราสามารถดูรายละเอียดทั้งหมดได้จากลิงค์ด้านล่าง

Installing Java OpenJDK
ติดตั้ง openjdk 17
$ sudo apt update
$ sudo apt install -y openjdk-17-jdk
ตรวจสอบการติดตั้ง
$ java -version
openjdk version "17.0.6" 2023-01-17
OpenJDK Runtime Environment (build 17.0.6+10-Ubuntu-0ubuntu122.04)
OpenJDK 64-Bit Server VM (build 17.0.6+10-Ubuntu-0ubuntu122.04, mixed mode, sharing)
Installing PostgreSQL
ติดตั้ง postgresql
$ sudo apt install postgresql postgresql-contrib
Start PostgreSQL service
$ sudo systemctl start postgresql.service
หลังจากติดตั้ง postgres แล้วเราจะมาจัดการ db และ user กัน
$ sudo -u postgres psql
คราวนี้เราจะเข้ามาอยู่ใน postgres console ละ เราจะทำการสร้าง db และ user ชื่อ sonarqube ส่วน Password ก็ตั้งให้มันยากๆ หน่อยนะ
CREATE USER sonarqube WITH PASSWORD 'Password';
CREATE DATABASE sonarqube OWNER sonarqube;
GRANT ALL PRIVILEGES ON DATABASE sonarqube TO sonarqube;
ลองตรวจสอบ db และ user ของเราซะหน่อย
\l
\du
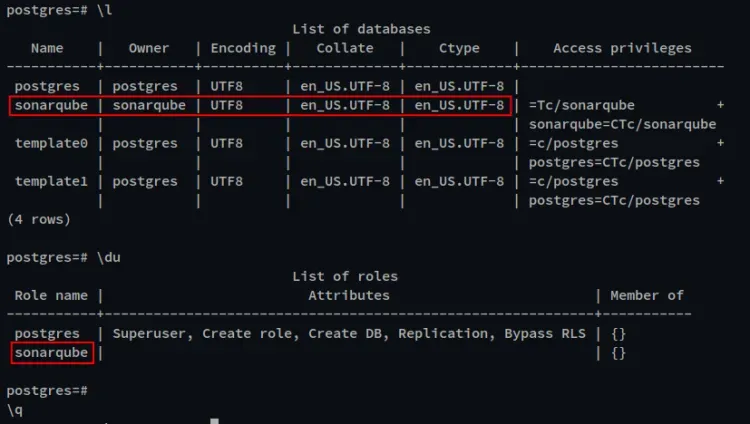
จากนั้นพิมพ์ \q ออกมา
ตั้งค่า Ubuntu เพื่อรองรับ SonarQube
สร้าง SonarQube user
$ sudo useradd -b /opt/sonarqube -s /bin/bash sonarqube
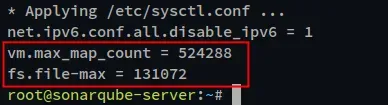
แก้ไขไฟล์ /etc/sysctl.conf
$ sudo nano /etc/sysctl.conf
แล้วทำการเพิ่มค่าดังนี้
vm.max_map_count=524288
fs.file-max=131072
ยืนยันการใช้ค่าใหม่
$ sudo sysctl --system
สร้างไฟล์ /etc/security/limits.d/99-sonarqube.conf
$ sudo nano /etc/security/limits.d/99-sonarqube.conf
ใส่ค่าดังนี้
sonarqube   -   nofile   131072
sonarqube   -   nproc    8192
ดาวโหลด SonarQube Package
เตรียม package ต่างๆ และดาวโหลด SonarQube 9.9
$ sudo apt install unzip software-properties-common wget
$ wget https://binaries.sonarsource.com/Distribution/sonarqube/sonarqube-9.9.0.65466.zip
ดูไฟล์โหลดเพิ่มเติม

เราจะได้ไฟล์ sonarqube-9.9.0.65466.zip จากนั้นทำการแตกซิบออกมา
$ unzip sonarqube-9.9.0.65466.zip
ทำการย้าย sonarqube ไปยัง /opt/sonarqube
$ mv sonarqube-9.9.0.65466 /opt/sonarqube
$ sudo chown -R sonarqube:sonarqube /opt/sonarqube
ตั้งค่า SonarQube
แก้ไขไฟล์ /opt/sonarqube/conf/sonar.properties
$ nano /opt/sonarqube/conf/sonar.properties
ทำการค้นหา และแก้ไขข้อมูล db
sonar.jdbc.username=sonarqube
sonar.jdbc.password=Password

sonar.jdbc.url=jdbc:postgresql://localhost:5432/sonarqube
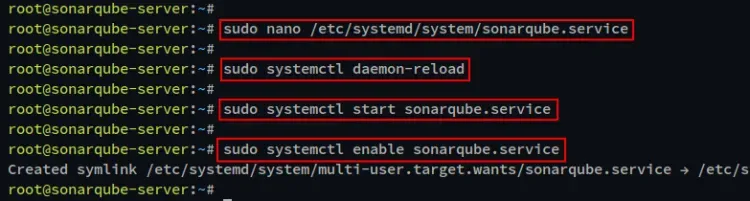
สร้างไฟล์ /etc/systemd/system/sonarqube.service
$ sudo nano /etc/systemd/system/sonarqube.service
ใส่ค่าดังนี้
[Unit]
Description=SonarQube service
After=syslog.target network.target

[Service]
Type=simple
User=sonarqube
Group=sonarqube
PermissionsStartOnly=true
ExecStart=/bin/nohup /usr/bin/java -Xms32m -Xmx32m -Djava.net.preferIPv4Stack=true -jar /opt/sonarqube/lib/sonar-application-9.9.0.65466.jar
StandardOutput=syslog
LimitNOFILE=131072
LimitNPROC=8192
TimeoutStartSec=5
Restart=always
SuccessExitStatus=143

[Install]
WantedBy=multi-user.target
ดูเพิ่มเติมได้ตามนี้
reload systemd ซะหน่อย
$ sudo systemctl daemon-reload
จากนั้นทำการเรียกใช้งาน sonarqube service ได้เลย
$ sudo systemctl start sonarqube.service
$ sudo systemctl enable sonarqube.service
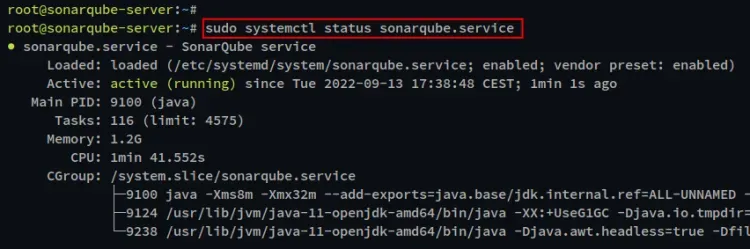
ตรวจสอบสถานะของ service ว่าทำงานไหม
$ sudo systemctl status sonarqube.service
ลอง curl http://localhost:9000 จะได้ตามนี้ เป็นอันว่าเราสามารถใช้งาน SonarQube ได้แล้ว
$ curl http://localhost:9000

<!DOCTYPE html>
<html lang="en">

<head>
    <meta http-equiv="content-type" content="text/html; charset=UTF-8" charset="UTF-8" />
    <meta http-equiv="X-UA-Compatible" content="IE=edge">
    <link rel="apple-touch-icon" href="/apple-touch-icon.png">
    <link rel="apple-touch-icon" sizes="57x57" href="/apple-touch-icon-57x57.png">
    <link rel="apple-touch-icon" sizes="60x60" href="/apple-touch-icon-60x60.png">
    <link rel="apple-touch-icon" sizes="72x72" href="/apple-touch-icon-72x72.png">
    <link rel="apple-touch-icon" sizes="76x76" href="/apple-touch-icon-76x76.png">
    <link rel="apple-touch-icon" sizes="114x114" href="/apple-touch-icon-114x114.png">
    <link rel="apple-touch-icon" sizes="120x120" href="/apple-touch-icon-120x120.png">
    <link rel="apple-touch-icon" sizes="144x144" href="/apple-touch-icon-144x144.png">
    <link rel="apple-touch-icon" sizes="152x152" href="/apple-touch-icon-152x152.png">
    <link rel="apple-touch-icon" sizes="180x180" href="/apple-touch-icon-180x180.png">
    <link rel="icon" type="image/x-icon" href="/favicon.ico">
    <meta name="application-name" content="SonarQube" />
    <meta name="msapplication-TileColor" content="#FFFFFF" />
    <meta name="msapplication-TileImage" content="/mstile-512x512.png" />
    <title>SonarQube</title>

    <link rel="stylesheet" href="/js/outV5A3AQEU.css" />
</head>

<body>
    <div id="content">
        <div class="global-loading">
            <i class="spinner global-loading-spinner"></i>
            <span aria-live="polite" class="global-loading-text">Loading...</span>
        </div>
    </div>

    <script>
        window.baseUrl = '';
        window.serverStatus = 'UP';
        window.instance = 'SonarQube';
        window.official = true;
    </script>

    <script type="module" src="/js/outL2Z6DMVA.js"></script>
</body>

</html>
SonarQube Installatioon
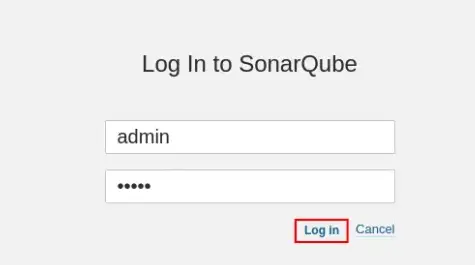
ให้ไปหน้าเว็บผ่าน ip ของ server เช่น http://10.11.12.123:9000 เราจะเจอกับหน้าเว็บ SonarQube แล้วทำการเข้าสู่ระบบครั้งแรกด้วย
- user: admin
- pass: admin
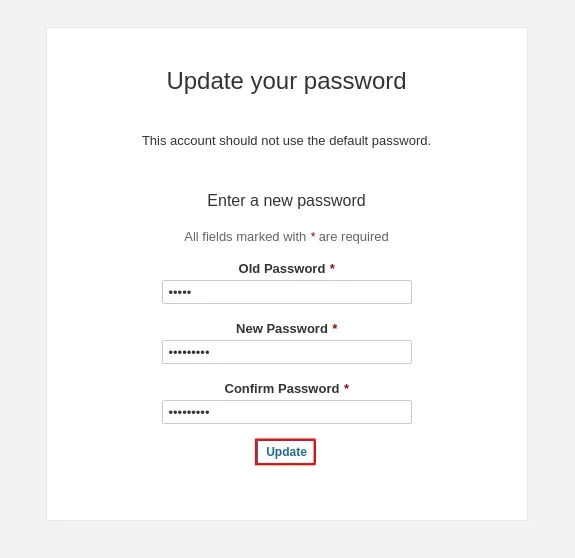
กำหนดรหัสผ่านใหม่
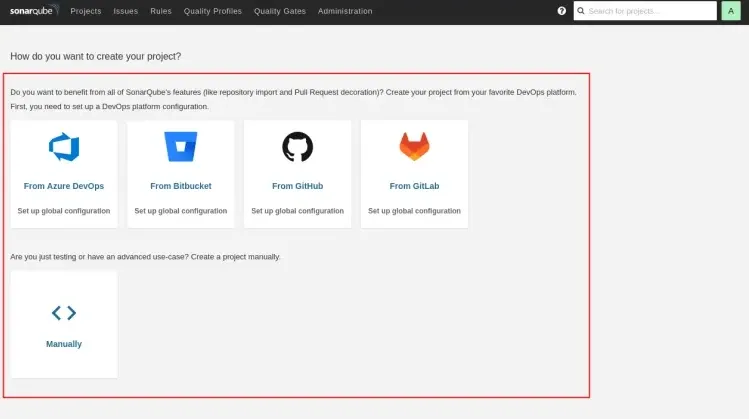
จากนั้นเราจะเจอหน้าแรกของ SonarQube แล้ว :) ยินดีด้วยจ้า...
Debug SonarQube
ในกรณีใครที่สั่งคำสั่ง systemctl start sonarqube.service แล้วมันเป็นสีแดงแบบไม่สามารถสั่ง start ขึ้นมาได้ให้ลองใช้คำสั่ง
$ /opt/sonarqube/bin/linux-x86-64/sonar.sh console
เพื่อให้มัน start service ให้แทนและมันจะมี log แสดงออกมาให้ดูว่า error ขั้นตอนไหน ให้แก้ไขไปตามนั้น
Thanks:
https://www.howtoforge.com/how-to-install-sonarqube-on-ubuntu-22-04/
https://www.itzgeek.com/how-tos/linux/ubuntu-how-tos/install-java-jdk-17-on-ubuntu-22-04.html
https://docs.sonarqube.org/